-
Shop
- Advanced Technologies
- AI Career Advantage Collection
- AI Skills Mastery 2026 Collection
- Beauty
- Best-Sellers
- Car Accessories
- Car Buying & Ownership
- Dating & Social Confidence
- Dating & Social Skills
- Denim
- 7FOR
- AGOLDE
- Antony Morato
- Armani Exchange
- Boss
- Brunello Cucinelli
- Calvin Klein Jeans
- Costume National
- Desigual
- Diesel
- Dolce & Gabbana
- Dsquared²
- Ermanno Scervino
- Fendi
- Gianni Lupo
- Guess Jeans
- Ichi
- Just Cavalli
- Lee
- Levi's
- Liu Jo
- Morgan De Toi
- Mother Denim
- Only
- Pepe Jeans
- Pinko
- Replay
- Valentino
- Vero Moda
- Digital Resources
- Education & Learning
- Family & Parenting
- Fashion
- Fashion Accessories
- Financial Education
- Gadgets
- Health & Beauty
- Health & Wellness
- Home & Garden
- Home Decor
- Home Styling & Organization
- Home Supplies
- Kids & Babies
- Kitchen
- Patio, Lawn & Garden
- Personal Growth
- Pet Care
- Pet Supplies
- Pets
- Sport & Outdoors
- Super Deals
- Wealth Building
- Budgeting & Saving
- Cryptocurrency Investing
- Debt Management
- Entrepreneurship & Business Growth
- Family Finance & Budgeting
- Financial Independence
- Financial Mindset & Psychology
- Financial Planning
- Frugal Living & Expense Hacks
- Goal Setting
- High-Income Skills
- Investing Basics
- Leadership
- Motivation
- Networking & Mentorship
- Passive Income Strategies
- Real Estate Investing
- Side Hustles
- Stock Market Investing
- Popular
- Best deals
DIY Wooden Balance Beam: Safe, Sturdy, Kid-Friendly

How to make a wooden beam balance?
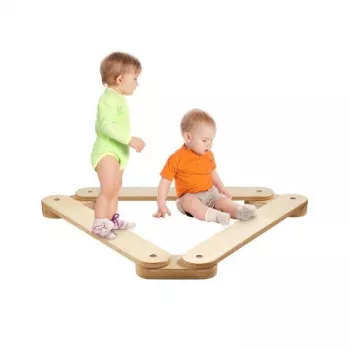
A wooden balance beam is a simple DIY that creates a safe, low-to-the-ground path for kids to practice coordination, focus, and controlled movement. The most kid-friendly version is a wide board set on stable supports so it won’t tip or slide.
Choose the right materials
Start with a straight, sturdy board (a 2×10 or 2×12 is a comfortable width for small feet). Pick wood that’s smooth and not warped. For supports, use two or three short “feet” made from thick lumber blocks or wide scrap boards—wider bases feel steadier than narrow risers.
Set a safe height and length
Keep the beam low—typically just a few inches off the ground—so stepping off is no big deal. A 6–8 foot beam works well for most play areas, but you can cut it shorter for small spaces or younger kids.
Build a stable base
Attach the support feet to the underside of the beam with wood screws (pre-drill to reduce splitting). Place one support near each end; add a third support in the middle for longer beams to reduce flex and wobble. Check that everything sits flat on the floor before tightening fully.
Sand, soften edges, and finish
Sand all faces and round over corners—especially the top edges and beam ends. Choose a child-safe finish (or leave it unfinished) and let it cure fully. For extra grip, consider a non-slip strip on the top surface or rubber pads under the feet to prevent sliding.
Get the full step-by-step tutorial
For detailed measurements, material ideas, and ways to pair a beam with stepping stones for calm, Montessori-style play, visit this complete wooden balance beam guide.
FAQ
What wood is best for a DIY balance beam?
A straight, knot-free board like pine or poplar is easy to work with and can be made very smooth; hardwoods are durable but heavier and harder to cut. Prioritize a board that stays flat and sands well.












Leave a comment